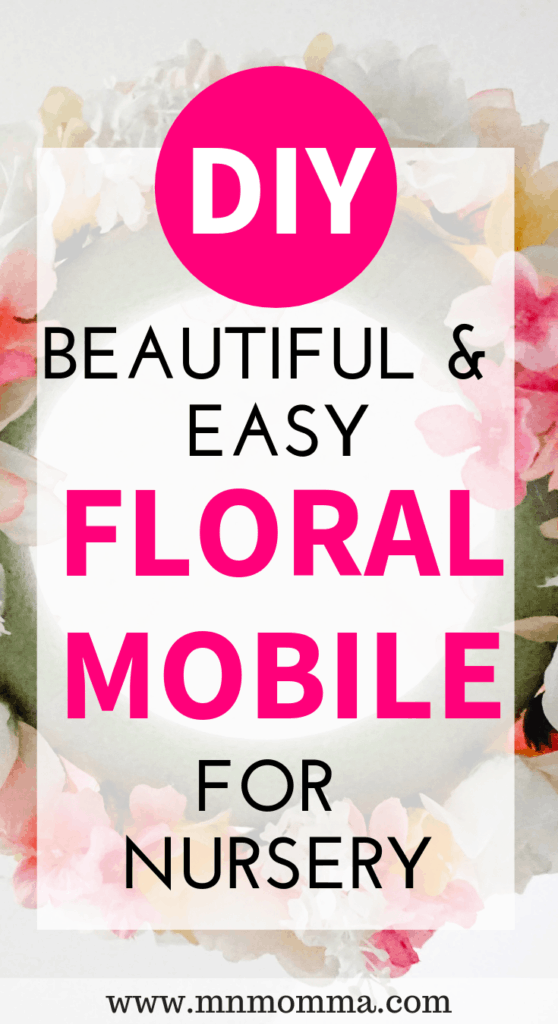
Easy DIY Floral Mobile for Baby’s Flower Themed Nursery


Disclosure: This post may contain affiliate links, which means I may receive a small commission if you click a link and purchase something. Please check out my disclosure policy for more details. All opinions are my own!
Creating a nursery for your baby doesn’t have to be expensive. Believe it or not, everything I used to create this DIY floral mobile for baby girl came from the dollar store.
And I can’t get enough of it! The whole project took me less than an hour and was so easy.
If you want to skip the DIY, etsy has some beautiful floral mobiles that you can choose from.
I also recommend checking out Hobby Lobby for flowers if you’re not finding the colors or selection you want near you.
Related:
- IKEA Nursery Hacks You Need In Your Baby’s Room
- 18 Adorable DIY Nursery Bookshelf Ideas for Baby’s Room
- DIY Dollar Store Hacks for Your Baby
Why a Baby Mobile is Beneficial
You might be wondering why a baby mobile is beneficial for your little one.
Well, believe it or not, they’re not just for looks.
A baby mobile in your little one’s nursery can actually help your baby with several developmental milestones. According to BabyMobile.com, these include:
- Developing Motor Skills
- Visual and Sound Stimulation
- Relaxation
- Educational
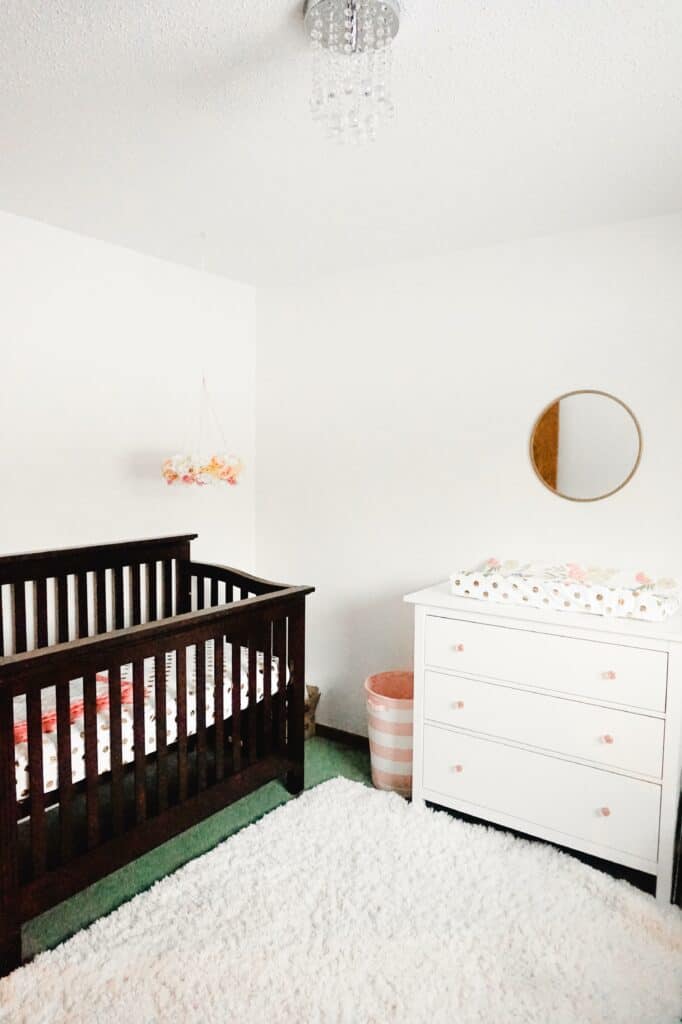
Baby Girl’s Nursery Ideas
I’m so excited to share our little one’s nursery with you!
We decided to find out the gender for our baby this time around and it’s been so fun not having to worry about staying gender neutral with the decor.
My baby girl’s nursery inspiration was simple and sweet. I went with a pink and white theme, with touches of gold.

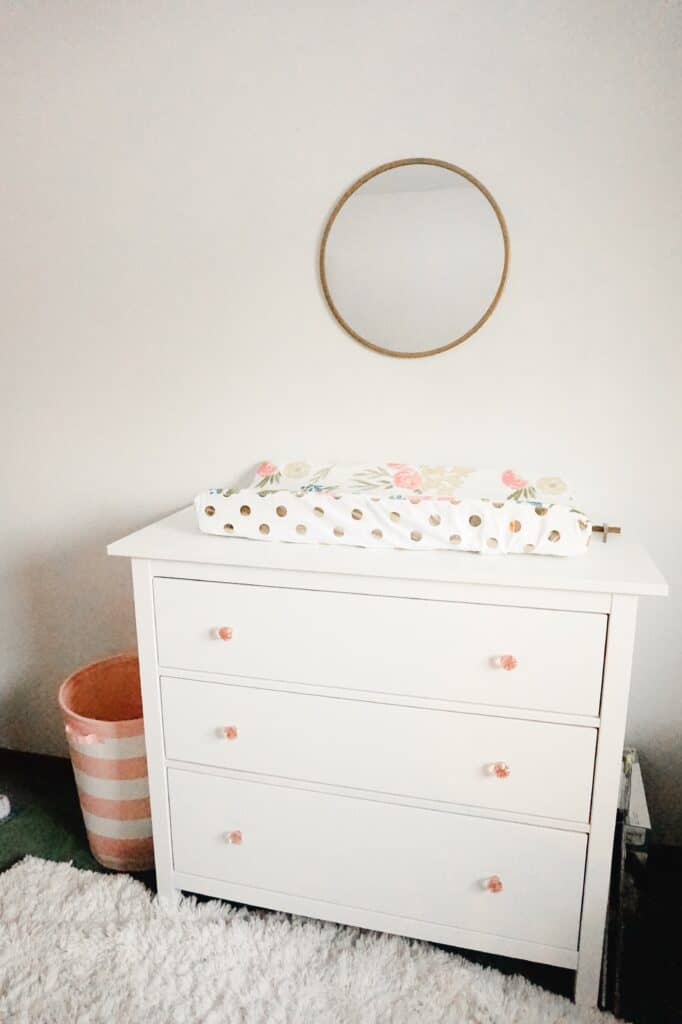
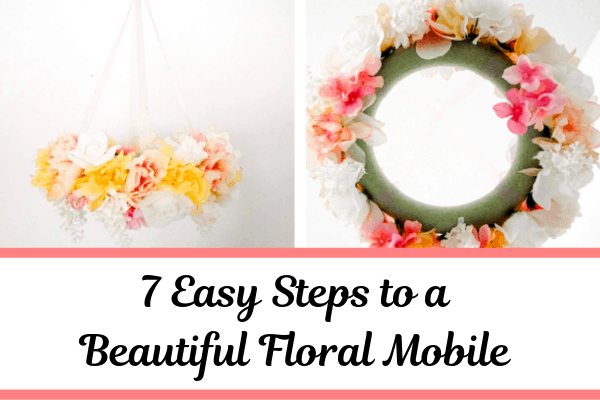
Okay, now that you’ve seen baby girl’s nursery – and hopefully gotten some girl nursery ideas – here’s how I made my homemade floral mobile for baby’s nursery.
Designing a Flower Mobile for Baby’s Room
Designing a beautiful flower mobile for your baby’s crib can be such a rewarding DIY project!
First things first, however, is to decide on the design of your mobile.
Consider what types of flowers you want to use, the color scheme you’re going for, and any special touches you might want to add to make it look more woodsy, whimsical, or modern.
You can go for soft pastels, vibrant colors, or even a mix of both!
It all depends on the look you want to achieve for your little girl’s nursery.
Once you’ve got your design for the DIY mobile chosen, head to Amazon or your local craft store to pick up the supplies listed below.
DIY Floral Mobile for Nursery
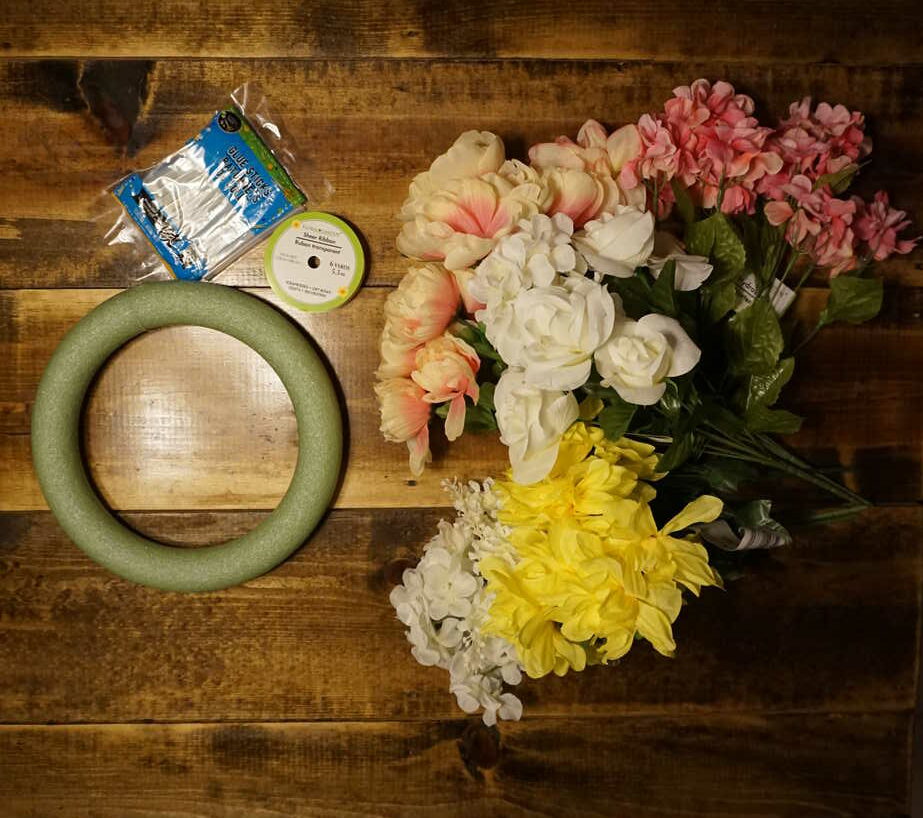
Supplies:
- 1 – foam wreath (10-16 inches will work best) / styrofoam wreath
- 10-15 flowers of various sizes (be sure to have large flowers, medium sized ones, and little flowers)
- Wire cutters (optional)
- 2 yards of ribbon
- Glue gun & glue sticks for it
- String/fishing line (optional)
- Scissors
- Ceiling hook
Step 1:
Cut your ribbon into 4, 18 inch strips.
These strips of ribbon will be used to hang your mobile, so they can be as fancy or as simple as you’d like.
Be sure to cut as precisely as possible to make sure your mobile doesn’t hang crooked or off-center.
Step 2:
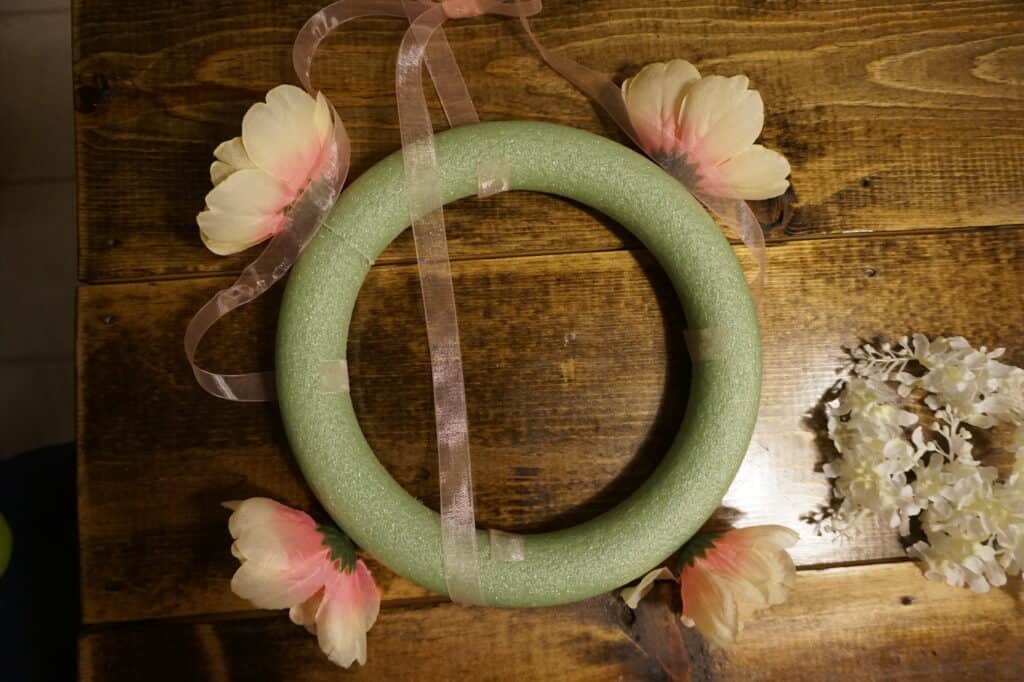
Attach each piece of ribbon to your foam wreath with a hot glue gun. You’ll want to wrap the ribbon under your wreath so the long end comes out along the outside of your wreath.
Be sure to space them as evenly as you can for a symmetrical and balanced look.
*I used a 10 inch foam wreath and it was perfect for the look I wanted.*
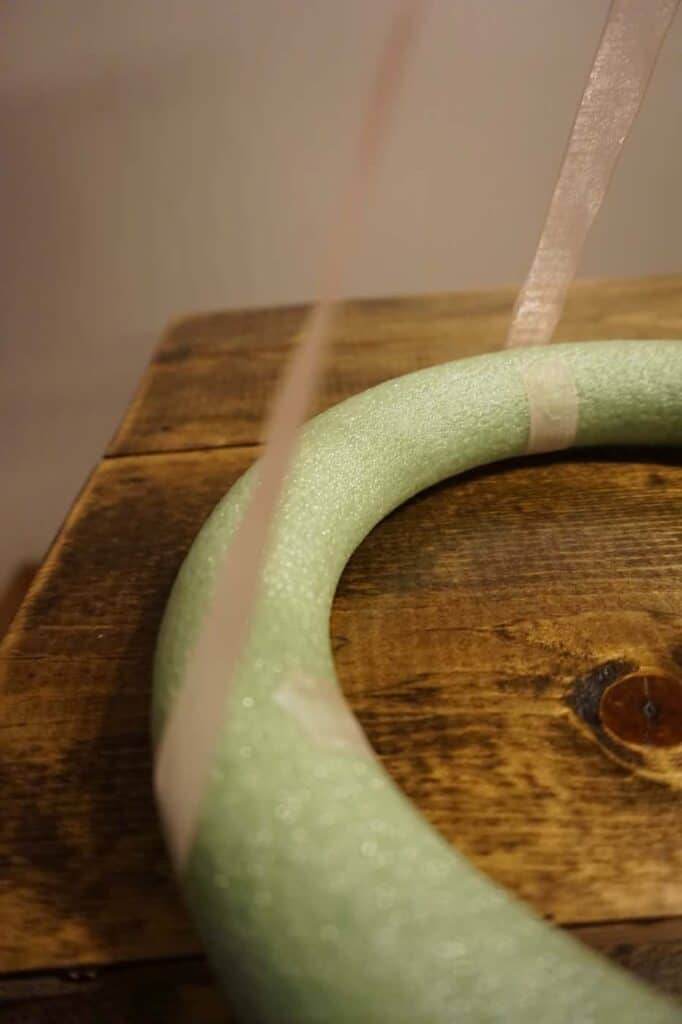
Carefully wrap each ribbon under your wreath and glue.
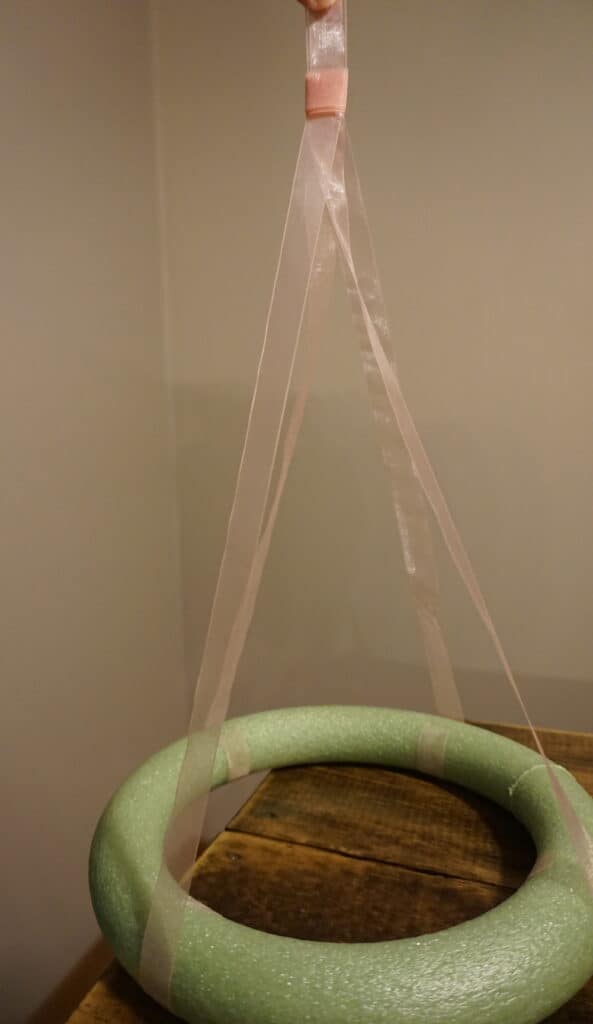
Step 3:
Secure your ribbon ends together above your wreath.
To do this, I used the hot glue gun to glue the top piece of each ribbon together. Then I cut a small piece of leftover ribbon to create a loop – and secured that with a dab of glue to either side of the combined ribbon.
To cover the glue, carefully wrap another piece of ribbon around that spot.

Step 4:
Pull the flowers apart from the stems. This should easily be able to be done by hand.
Gently grab the base of the flower and pull. You may want to keep some of the greens to add to your mobile later depending on the look you’re going for.
If your flowers do not easily pull away from the stems, cut them about a 1 cm from the base of the flower.

Step 5:
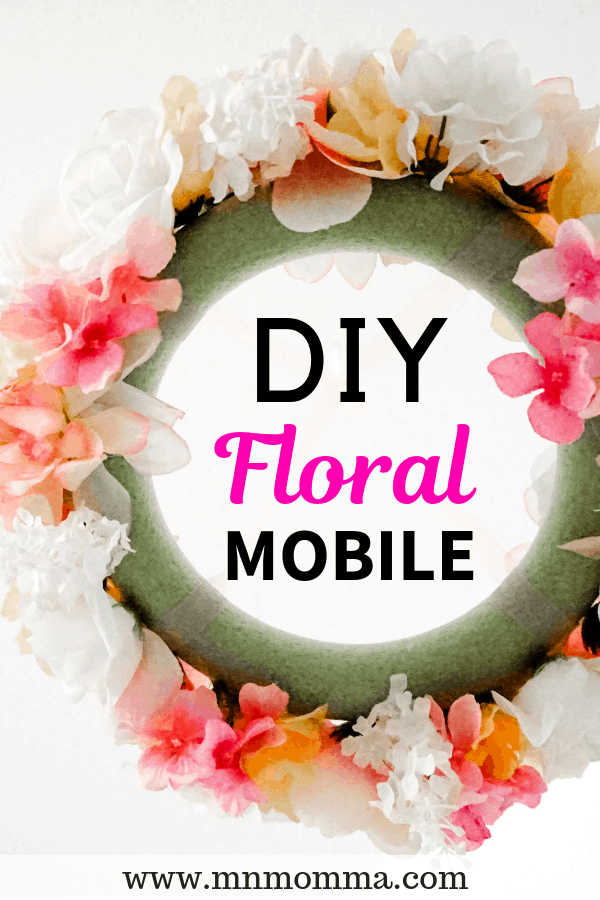
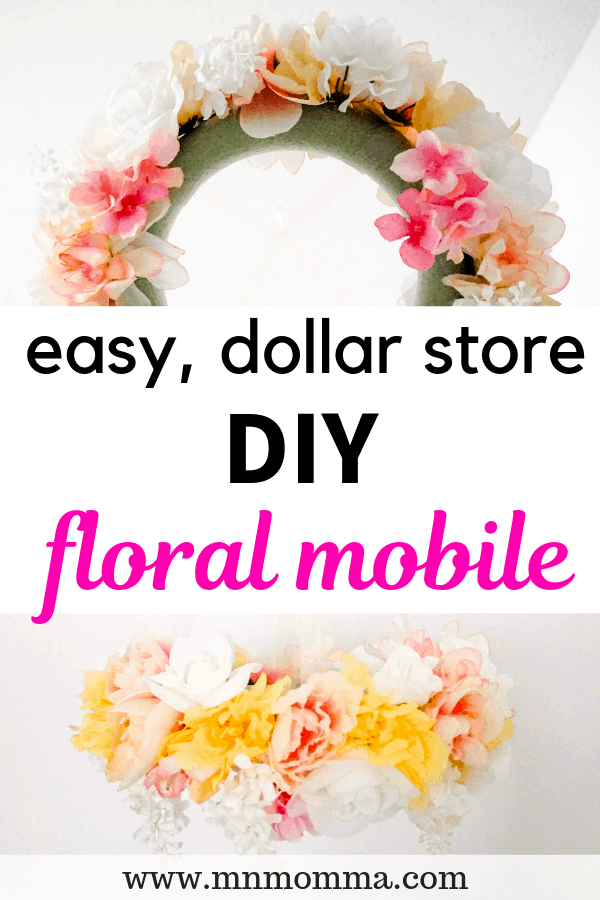
Add your flowers to the wreath!
I recommend starting with the largest flowers and then working your way to the medium sized ones, and then finally ending with the small flowers.
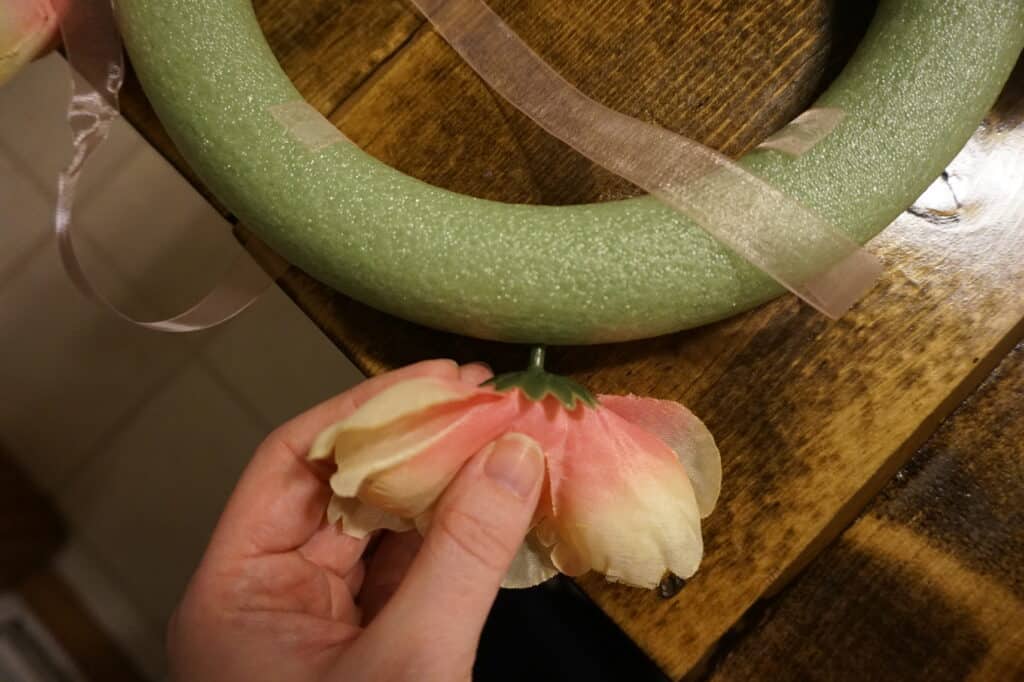
The best trick to get your flowers to stay is to push the green nub that’s left on the back of the flower into your foam wreath. Then pull it out, add some hot glue to the tip, and reinsert into the same spot.
This should help hold your flowers in place securely.
Feel free to make your flowers look symmetrical or random – depending on the look you’re going for.
Continue adding flowers until the sides of the wreath are covered.
Consider adding them to opposite sides of the loop or in different directions to vary the floral pattern you’re creating.
Do not feel like you need to cover the entire top or inside of your wreath. This part likely won’t be seen. However, if you have extra flowers and want to keep going, feel free!
Step 6:
To make sure you have the bottom of your wreath covered, flip it upside down and set on a table or small box. Then continue to add flowers.
Step 7:
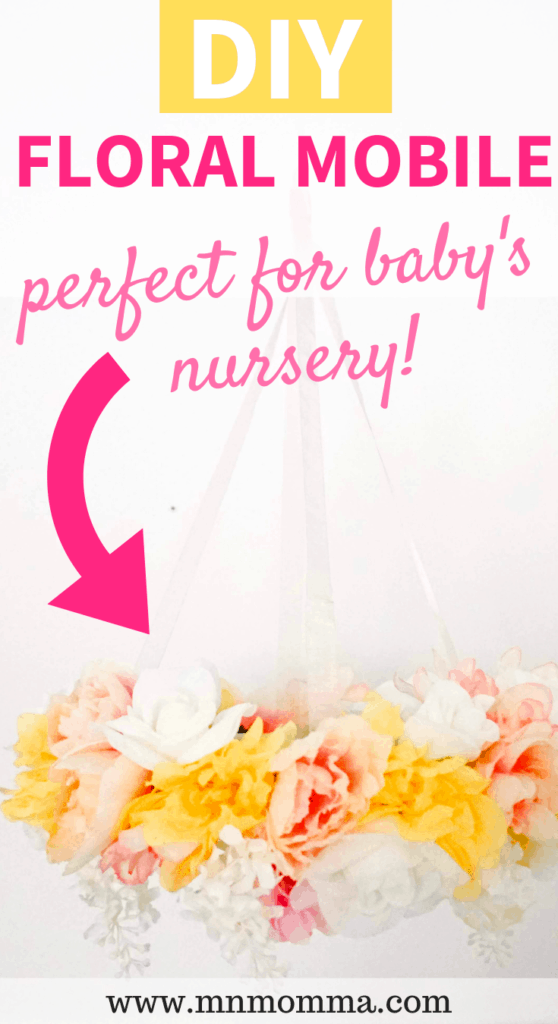
Once you’re happy with how your mobile looks, it’s time to hang it!
To hang the mobile above the crib, use a sturdy hanging fixture or attach it to the ceiling with some strong fishing wire strands.
Safety is crucial, so make sure everything is securely fastened.
Once you’re done, step back and admire your colorful, handmade mobile!
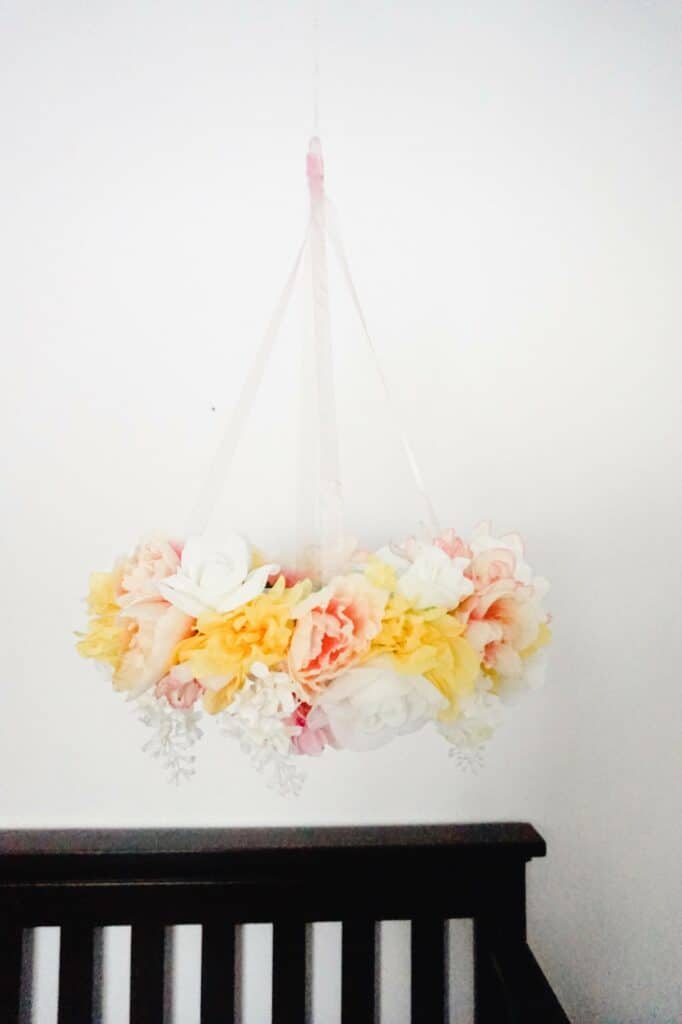
To get it to hang at the right height, simply use string or a piece of fishing line for a less visible look, or another piece of hanging ribbon.

Alternatives and Substitutions
Your floral mobile doesn’t have to match mine exactly, in fact, that’s one of the best parts of DIY – you can create your design exactly as YOU see fit.
Here’s a few substitutions you can consider when making a floral mobile for your nursery:
- Embroidery Hoop: If you’d prefer, you can use an embroidery hoop instead of the foam ring as the base for your mobile.
- Personalized Additions: If you have a Cricut machine, you could cut out felt flower pieces easily or hand sewing is just as great if you prefer a more handmade touch. Once you’ve chosen your colors, start cutting out different sizes and shapes of felt flowers and flower buds. You can also add some felt balls or use faux flowers to give your mobile a unique and whimsical touch.
- Create a more elaborate design: try creating groups of big flowers at the center of the flower mobile and smaller flowers around the outer ring. You can even add some hanging ribbons or wooden beads for extra flair. Get creative and experiment with different looks until you’re happy with the arrangement.
- Buy extras: If you’re not into sewing, you can also find DIY kits online that come with pre-cut felt pieces and instructions to make your own flower mobile. Or, if you prefer a quicker option, some craft stores sell ready-made flower mobiles that you can simply hang above the crib.
In the end, no matter how you decide to design your flower mobile, the final product will surely be a stunning addition to your baby’s nursery.
It’ll be a lovely focal point as your little one explores in their crib, surrounded by the beauty of their floral nursery.
FAQ
How high should a mobile be above a crib?
Wondering what height you should be hanging your baby’s mobile above the crib?
You want it to be within your baby’s line of sight, but out of their reach.
A good rule of thumb is to hang it about 12 to 18 inches above the crib mattress.
That way, your curious munchkin can enjoy the visual stimulation without any risk of grabbing onto it.
Can you make your own baby mobile?
Want to try your hand at DIY-ing a baby mobile?
You can totally do it!
And it’s a sweet way to add a personal touch to your baby’s nursery.
Whether you’re crafty or not, you can give it a shot.
There are plenty of tutorials online to guide you (including this one on how to create a floral mobile for baby’s room!), or you can let your creativity run wild.
You can use things like colorful paper cutouts, felt shapes, or even tiny stuffed animals – the options are endless!
Just be sure that whatever you use is well secured so no little pieces end up in baby’s tiny hands or mouth.
What string to use for baby mobile?
Alright, let’s talk about the string for your homemade baby mobile. Safety first!
Make sure to use a non-toxic and baby-safe material like cotton or nylon thread. You definitely don’t want anything that could pose a choking hazard. Double-check that it’s sturdy enough to hold the weight of the mobile’s components, but also soft enough not to hurt those tiny little hands.
How long should the string be for a baby mobile?
So how do you know how long the string should be for baby’s mobile?
This is going to depend on the height of your ceiling, how high up baby’s mattress is, and how far your mobile dangles from the string.
That said, here’s an easy trick:
Take a measuring tape and hang it from the chosen spot above the crib. Then, try out different lengths until you find that sweet spot where the mobile is within the ideal height range we mentioned earlier.
Once you’ve got it, measure the length and voilà! You’ve got your perfect string length.
What age is a mobile good for a baby?
So when does a baby really start appreciating a mobile hanging above the crib?Well, baby mobiles are fantastic for stimulating newborns and infants up to around 5 to 6 months old.
At this age, babies are discovering the world around them, and a mobile can captivate their attention, encourage visual tracking, and aid in their cognitive development. However, once they start becoming more active and trying to grab things, it’s time to retire the mobile to avoid any potential safety risks.
How to Make A DIY Baby Mobile On A Budget
I absolutely love how this sweet DIY floral mobile turned out! It really adds the little “extra” touch to sweet baby girl’s nursery that I was looking for.
Plus, I was totally able to make this nursery mobile on a budget. A major benefit if you’re tight on money or hoping to spend a little extra elsewhere in your baby’s nursery.
If you give this DIY floral mobile tutorial a try, I’d love to see your results! Share them in the comments below or save this post for later!
<— Pin it for later!