How To Make The Ultimate Amazon Baby Registry
Disclosure: This post may contain affiliate links, which means I may receive a small commission if you click a link and purchase something. Please check out my disclosure policy for more details. All opinions are my own!
With all the baby products out there, creating an Amazon Baby Registry should be one of your first projects.
A baby registry is perfect for friends and family hoping to get you a gift or as a place to keep track of your nursery ideas!
Also, Amazon offers a ton of perks to creating a baby registry that you’re not going to want to miss – and it’s free!
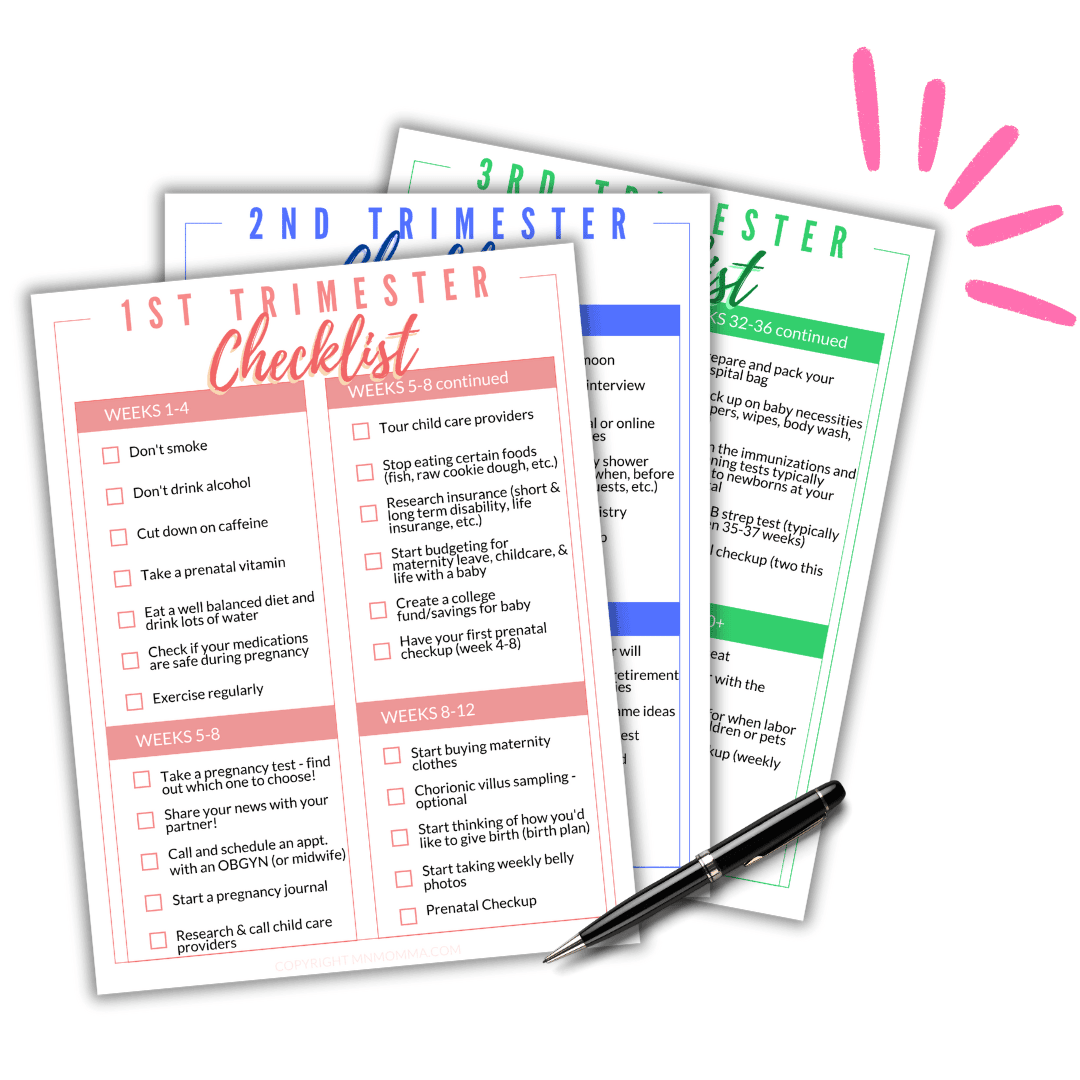
Before you get started, you might be looking for the Ultimate List of Newborn Essentials (including a list of what you don’t really need) – check this one out!
You can also grab your free complete newborn checklist by putting your e-mail in the box below:
How to Make the Ultimate Amazon Baby Registry
1. Create An Amazon Account (if you don’t already have one)
In order to have an Amazon Baby Registry, it only makes sense that you need to have an Amazon account.
The best part is that creating an Amazon account and a baby registry is completely free. If you choose to get Amazon Prime, it does offer some unique perks for your registry – including a Welcome Box full of goodies!
2. Click Here to Start Creating Your Registry
To start creating your own Amazon Baby Registry, find the drop down menu on “Account and Lists” and choose “Baby Registry”. Or you can simply click here and go right to it!
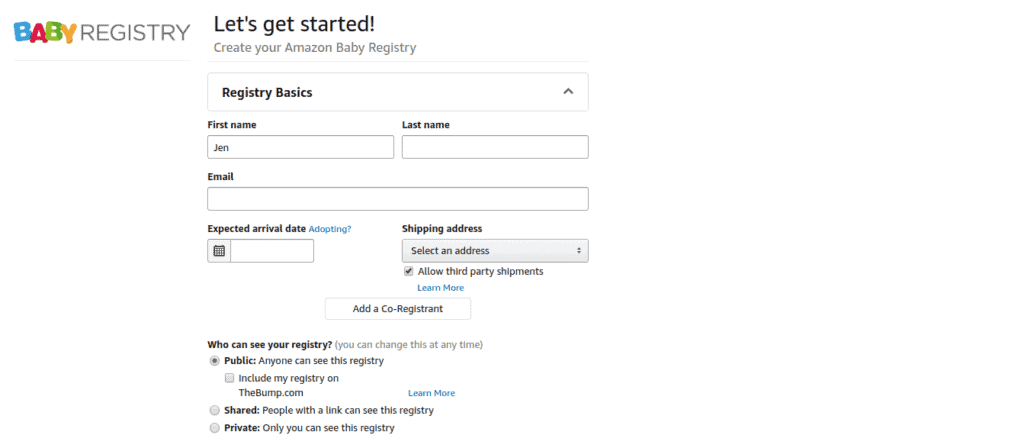
3. Fill Out Your Registry Details
Filling out your Baby Registry details is an important step to creating your registry.
You’ll want to enter your name (as your friends or family would search it), your email address, and your expected arrival date.
Add Your Address
As an option you can also select a shipping address. I highly recommend you do this!
By adding a shipping address you’re allowing your friends and family to be able to ship a gift right to you. This can be a huge lifesaver for larger gifts or relatives that live far away.
Add Your Spouse!
The next detail you don’t want to miss is the option to add a “co-registrant”. Add your hubby’s name to your registry so if someone looks him up, they’ll also find your list!
Public vs. Private
You can also choose how public you want your Amazon Baby Registry.
While you’re creating it, you may want to set it private. However, when you’re ready to share with friends make sure you choose “Public” or “Shared” depending how visible you want it to be to outside searchers.
I often find it easiest to choose the public registry, so all your guests have quick and easy access. But if you want to keep things a little more private, choose shared and send an email to your close friends and family!
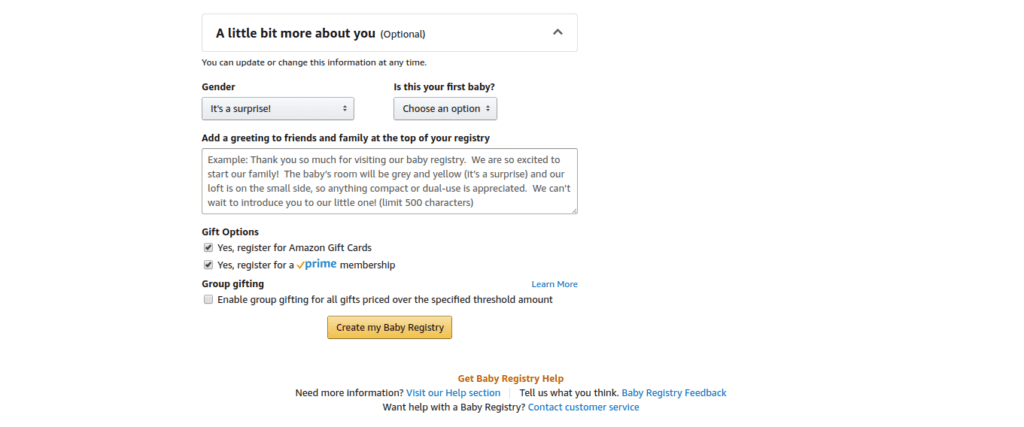
Don’t Forget the Bonus Sections
Believe it or not, there’s one more part of “filling out the basics”. This is a what I like to call a bonus section (if you remember to look for it!).
Below the basic details, make sure you click “A little bit more about you (optional)”.
This opens up a new section for you to add details about your baby! It’s also a great time to add a welcome message that thanks your friends for visiting your registry and can give them details about your theme or nursery colors.
4. Add Items to Your Registry
Okay, now it’s the fun part! You get to choose all the fun (and not so fun) baby items to add to your Amazon Baby Registry.
Be sure to check your registry before you even start though, sometimes Amazon likes to throw in a few items they recommend to get you started. If you like them, great! If not, feel free to remove them from your registry.
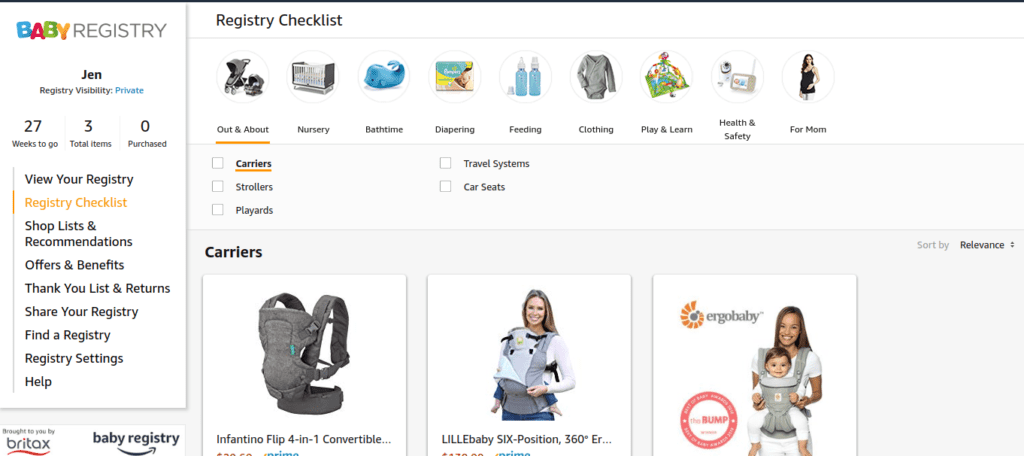
Adding Products Through The Amazon Baby Registry Checklist
There are two great ways to add items to your baby registry.
The first one is by going to your registry home page and choosing “view checklist”. I have to admit – it’s a pretty amazing tool! It’s even been upgraded since my last pregnancy and I’m so excited to use it for our new baby.
The checklist shows you categories of baby items (nursery, out & about, bathtime, feeding, etc.) and allows you to add them to your registry with one easy click.
My favorite parts of the Amazon Baby Registry Checklist are being able to compare products side by side with pictures, price, and Amazon ratings. I LOVE LOVE LOVE the ease of this new checklist system!
Adding Products Through Amazon
Sometimes there are products you want on your baby registry that the checklist just doesn’t have.
While Amazon’s checklist can be a great way to not forget something important, it certainly doesn’t cover all brands and styles, or even all baby items! Don’t worry though, there’s an easy fix for that!
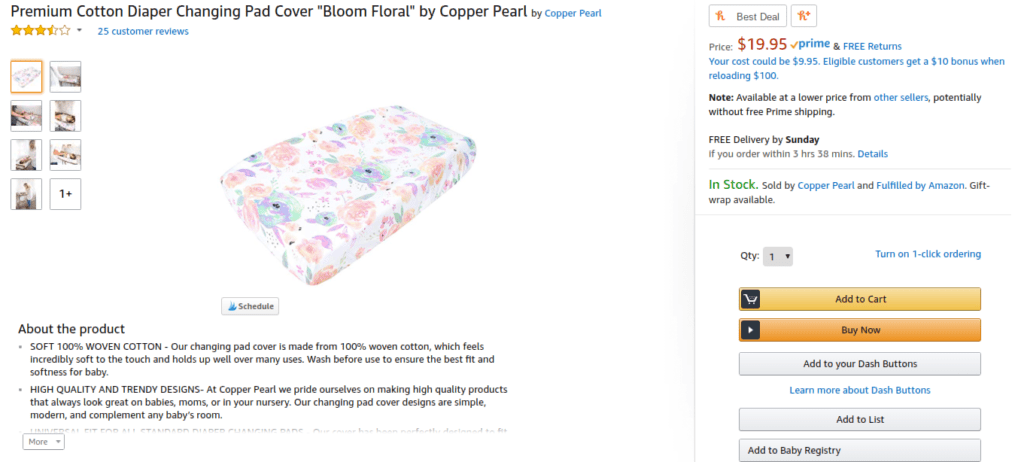
For example, I LOVE this adorable floral changing pad cover, but guess what? It’s not listed on Amazon’s Baby Registry Checklist. Thankfully, Amazon’s still got you covered.
Adding products through Amazon is easy. Simply use the search bar and find the exact baby product you’re looking for, then look under the “Add to Cart” button and find the button that says “Add to Baby Registry”.
Adding Products From Other Sites
Sometimes Amazon doesn’t have everything.
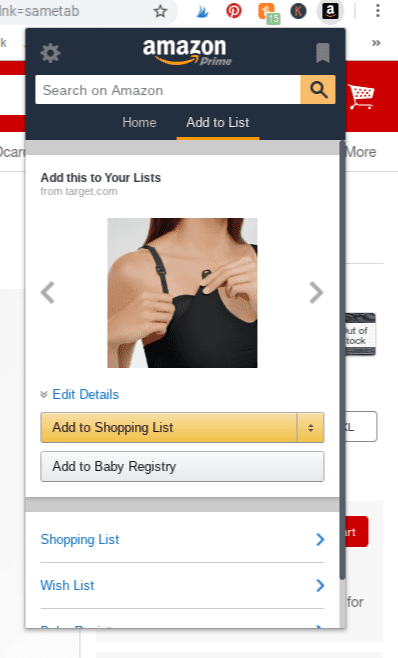
For example, I loved this Medela Nursing Tank from Target (it’s my go to ALL THE TIME during postpartum) and will definitely be putting another one on my registry for this baby.
To add a product from a different website, simply install Amazon Assistant and go to the website’s product page.
Once there, click the Amazon Assistant logo in your toolbar, choose add to list, and then click the “Add To Baby Registry” button.
What’s great is that even though the item isn’t purchased through Amazon, friends and family can still mark the item as purchased on your registry.
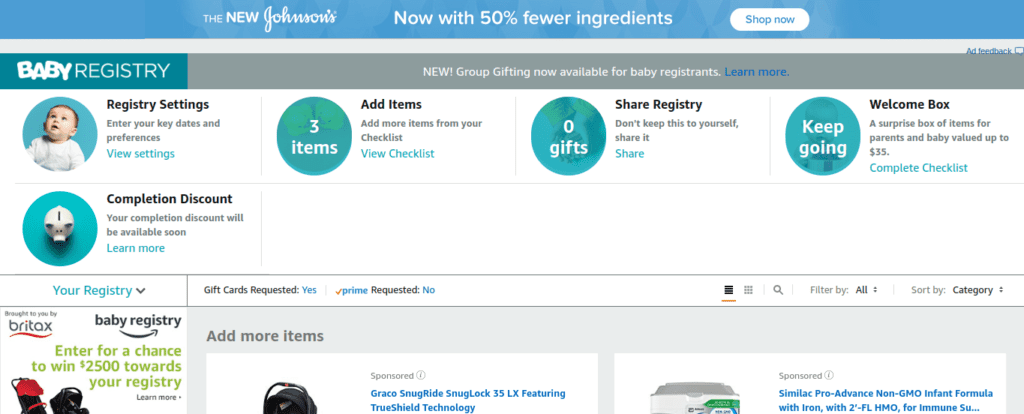
5. Don’t Forget Your Welcome Box!
If you’re an Amazon Prime member you’ll get a free welcome box for completing your Amazon Baby Registry!
The welcome box is filled with items for you and your baby valued up to $35. The exact products inside are always changing, but free baby products are always a major win in my book!
Welcome Box Secret: Pssst, even if you’re just a 30 day free trial member of Amazon Prime, you’ll still get the welcome box if you complete your registry and order $10 worth of items before your trial runs out. So don’t miss the opportunity!
Keep in mind there are a few steps to getting your welcome box.
- Complete Your Registry Checklist – they mean one product from every category needs to be on your registry! If there’s an item that you don’t need, choose the category and select “mark as complete” – Amazon will still count this as a completed registry!
- $10 of Purchases from Your Registry (that have shipped) – this can be purchased from guests or from you personally
Now, just because you’ve completed these two requirements, doesn’t mean Amazon will automatically send you the welcome box.
With my first pregnancy I almost missed getting my welcome box because I thought they’d just send it to me. Don’t make my mistake!
Instead, once the two requirements are completed, go to your registry home page and look for the “Claim Now” button on the left side.
This will add the welcome box to your Amazon shopping cart! Check your email and you should get an email from Amazon within 1-2 days with instructions on how to get your welcome box.
Click here for more details on the Welcome Box from Amazon.
6. Share Your Registry
Now that your Amazon Baby Registry is complete, it’s time to share it with family and friends!
Here’s a few great ways to share your registry and let people know that you have a list:
- Add it to your baby shower invitations – “Jen is registered at Target & Amazon”
- Choose the share registry option on Amazon and email your family and friends the link to your registry
- Share the link to your registry on your social media
- Add your registry to your page on The Bump
- Use word of mouth – tell your family and friends!
7. Grab Your Amazon Baby Registry Completion Discount!
As one last perk from Amazon for creating your Baby Registry you’ll receive 15% off (10% off for non Prime members) on all items remaining on your list after a certain date.
This date is based off your due date (typically 60 days prior to your due date).
You’ll be able to make two purchases with the discount code and it only applies to select items in baby related categories – so you probably won’t get 15% off that new TV you added to your baby registry. 😉
If you want all the specifics on the Amazon Baby Registry completion discount, you can check them out here.
Benefits of An Amazon Baby Registry
There are several awesome benefits of an Amazon Baby Registry – some of which you do need to be a prime member to enjoy, but others you don’t!
- Add products from anywhere to your Amazon Baby Registry!
- Friends and family can send your gifts directly to your house
How to Make Your Baby Registry Even Better
Personalize Your Baby Registry With A Welcome Message
Don’t forget this easy to add detail!
By adding a welcome message to your Amazon Baby Registry, you can let your friends and family know important information.
Do you know you’re having a girl? Do you know her name? How about nursery colors or theme?
Help your friends out but cluing them in on this information to be sure you get the baby products you really want!
If you forgot to add a welcome message during your registry set up, you can always go to your registry home page and edit the welcome message by choosing “Registry Settings”.
Add Comments
Amazon let’s you add comments to the products you add. This means you can get specific – which is great for those browsing your list! Add the size or color for specific products, or even tell your guests something is the “most wanted” gift on your registry.
Registry Complete ✓
Congratulations! Now that your Amazon Baby Registry is in tip top shape, enjoy this time preparing for your sweet new little one! Remember you can always go in and update your registry from your phone or computer.
I’d love to hear about your most loved registry items. Also, don’t miss my complete list of baby registry essentials!
Related: How to Have A Virtual Baby Shower (When You Can’t Get Together)
Related: The Best Baby Shower Thank You Card Ideas (& What to Write!)
Related: Baby Budget Worksheet & Guide for New Parents

One Comment